
ASSIGNMENT - test the design rules for your printer(s) (group project) | design and 3D print an object (small, few cm) that could not be made subtractively | 3D scan an object (and optionally print it)
Design and print something which cannot be milled (additive rather than subtractive production)
3D PRINTING {THE DESIGN BITS}
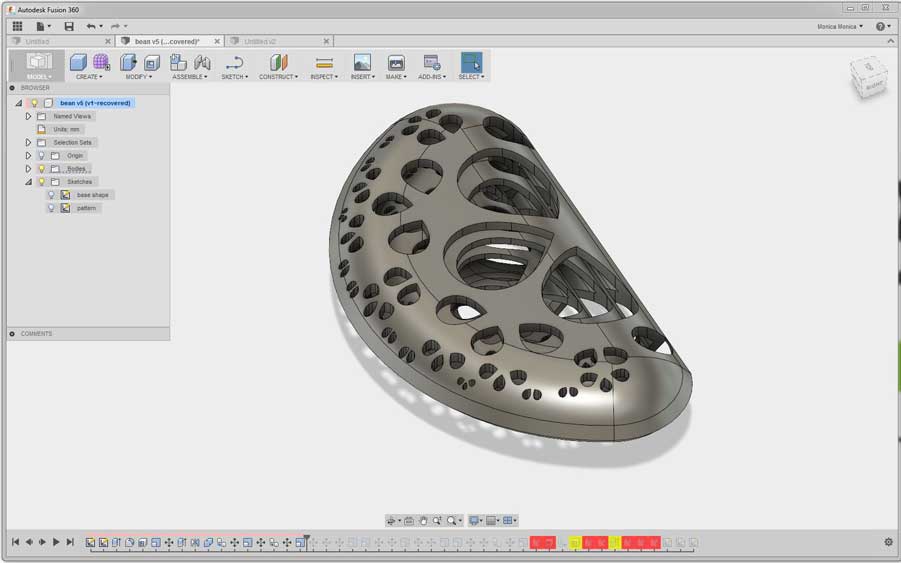
I decided that I would stick to the sand dollar design, using it through out the weekly projects. This became quite challenging, attempting to import it into various 3D programmes, and then manipulating it into the shape I wanted it to be.
I started by trying to pull the flat artwork from coreldraw into Fusion 360, which proved to be difficult as it wasn't reading the files.
I then tried importing the extruded RHINO file I had made in week 02, and this worked. But I could not manipulate the artwork.
I then tried working on the design in RHINO, however my knowledge of using RHINO is not such that I was able to understand how to manipulate the design.
I went back to Fusion 360. After watching some tutorials on working with sketches I realised that I could use the extruded RHINO file to recreate the sketch and make a new body.
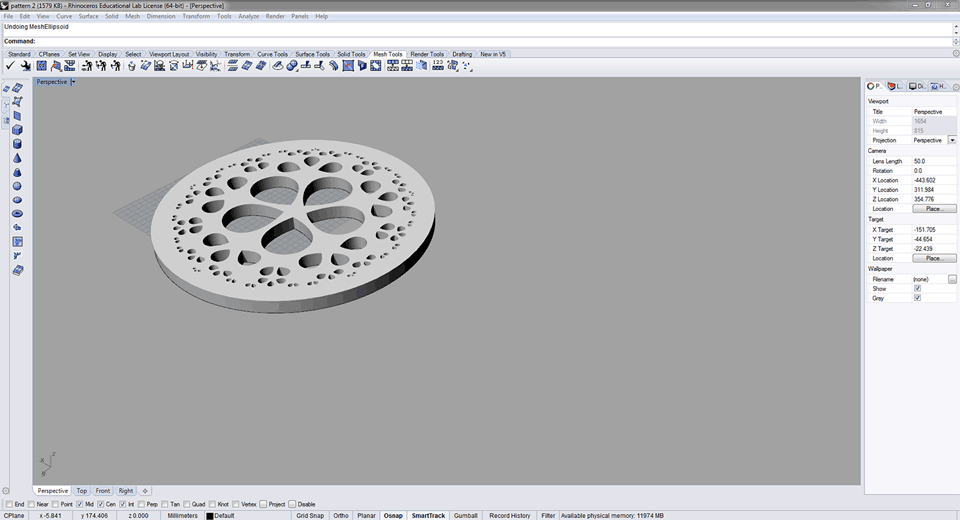
Now that I had the pattern I could start building the shape I wanted it to conform to.
I started by building a loft object in the final shape. I created and used planes to place the different heights of the loft, using the create panel and choosing offset plane, this allows you to manipulate heights of your lofts far more easily and at any stage during the design, because each sketch is then attached to the plane. I built the loft and then realised that extruding the pattern through the design as it was would not give me the final product I had envisioned.
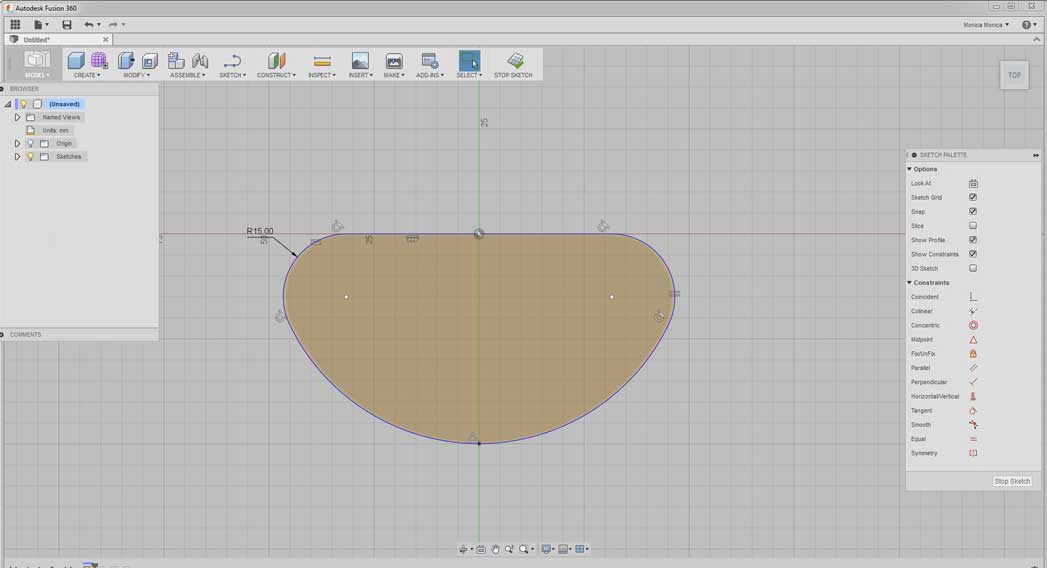
So I started again, with the idea to rather build it in two parts. So I started with the sketch of 1 half of the shape. I set parameters and constraints using the sketch palette. Afte this I extruded the shape, adding a taper to the top of it to start the curve of the shape.
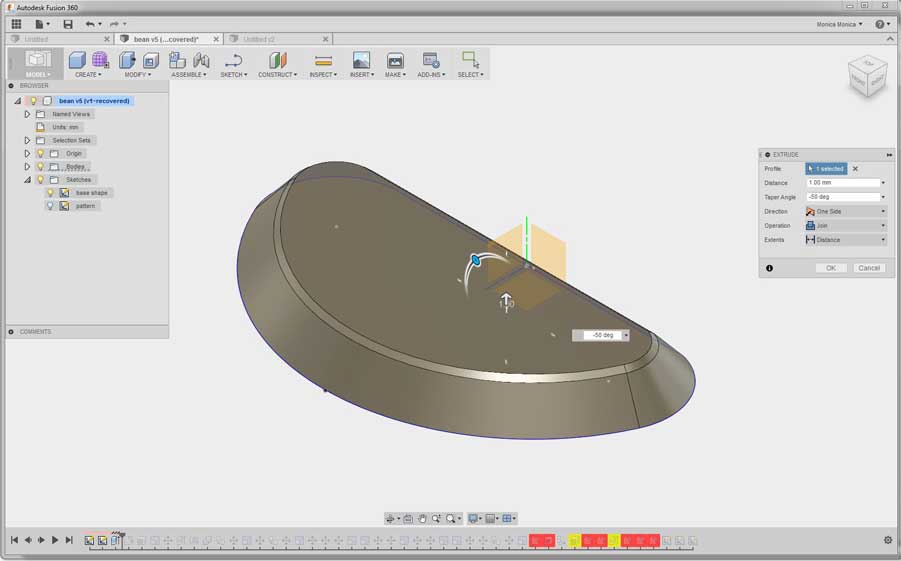
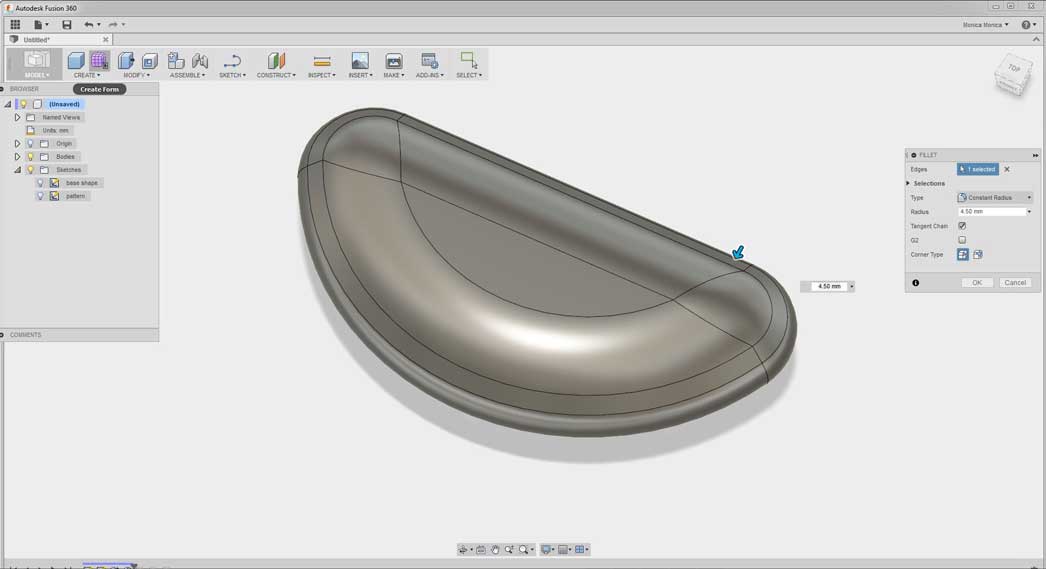
Then I added a fillet to further smooth the surface curve and shelled the shape to 1mm thick. When it came to printing I had to go back and increase this to 2mm.
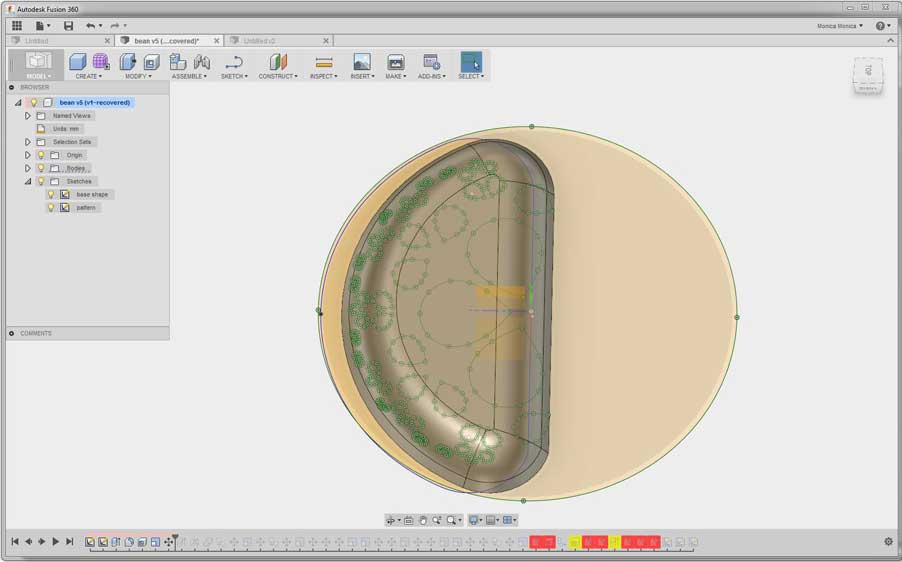
I then made the pattern visible in the browser. Deleted one half and placed the filleted shape over the pattern. I then simply extruded the pattern and selected cut from the pallette to create the pattern on the shape.
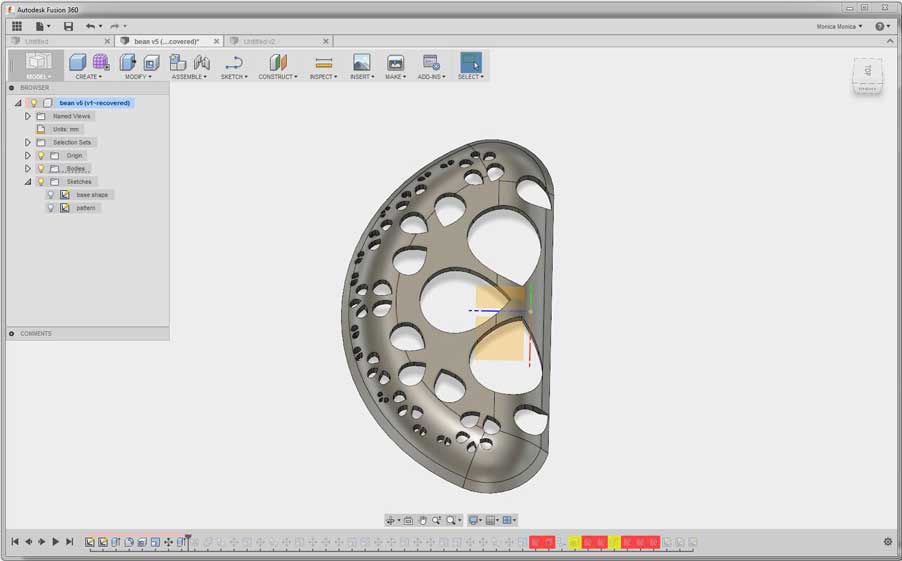
After this I mirrored the shape on the x axis and combined the two sides to form one shape. Then I copied and pasted the body and scaled it down, repeated this process to have 3 "pods" one inside the other. Which I believe makes my design additive rather than subtractive.
3D SCANNING {COMB TEETH}
To try and create the comb I thought I would use this as the scanning part of the weeks assignment to then add to the design and print as the final product. I had many issues with programmes and techniques.
We started testing on the kinect 360. We used Kscan3D and artech, neither of which were giving very successful outcomes. The models looked like mush.
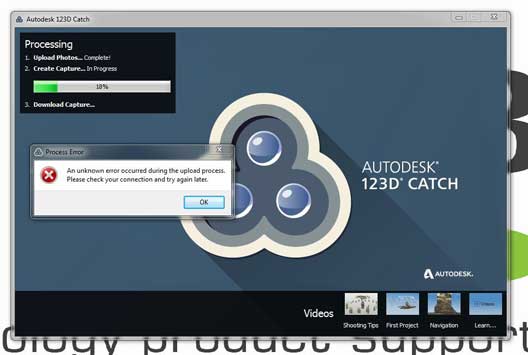
We then tried to use 123D catch, but this kept throwing out error messages. Uninstalled, reinstalled still no difference.
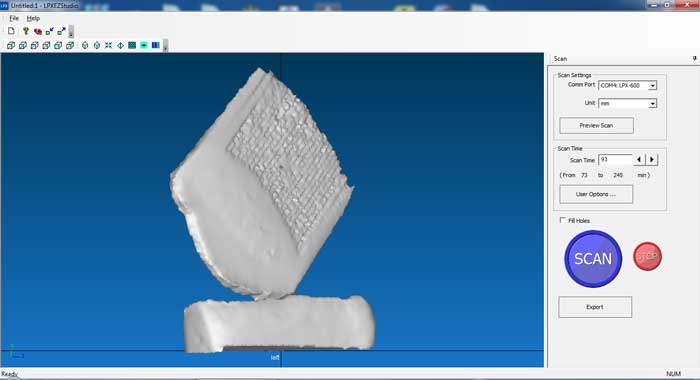
Finally we tried the Roland Picza LPX-6000. This takes quite some time and the final scan was not quite as good as I had hoped. I exported this as a RHINO file which I will then attempt to clean up and attach to my design.
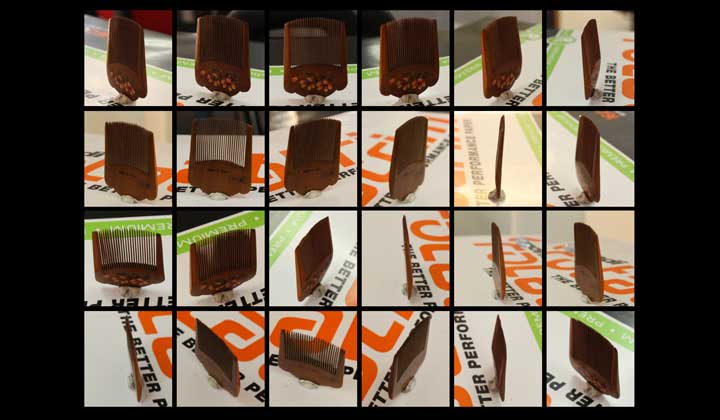
3D PRINTING THE FINAL DESIGN {UPDATE}
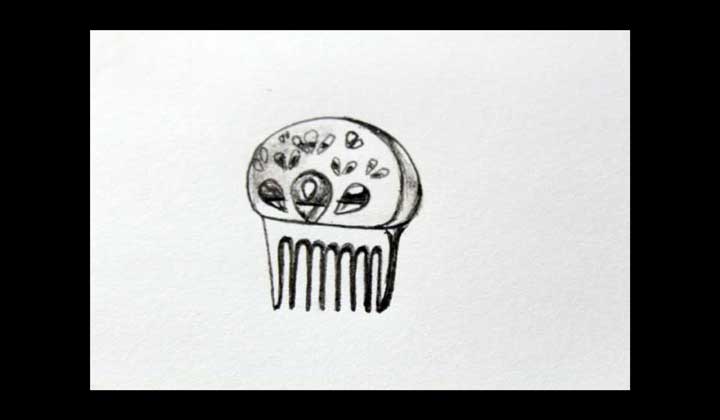
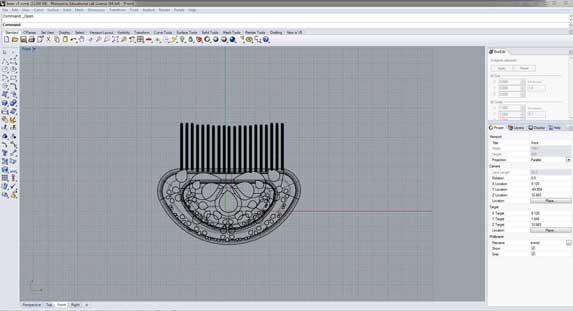
So I felt I wouldn't get very far attempting to clean up the comb, and realised that the scanner works better with solid objects, with no light filtering through. I therefore downloaded a comb file from thingieverse.

I edited it in Rhino removing the top part. I then imported my sand dollar design and combined them. I decided that the size of the comb (5mm wide) would not be worth printing the third "bean". So I only printed one inside the other.
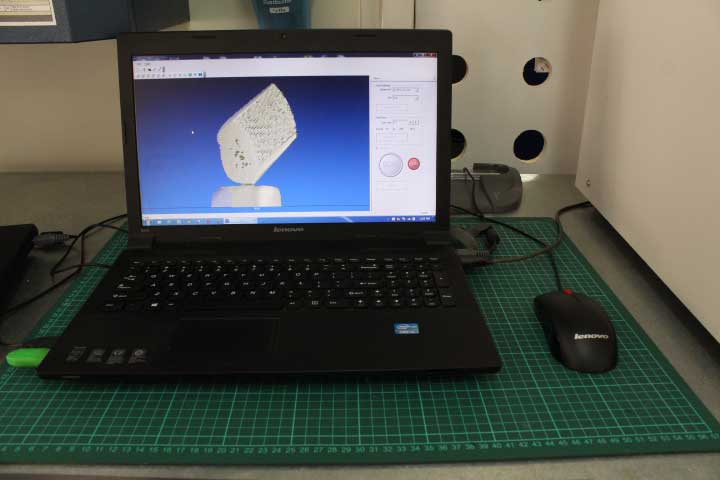
I then exported the file as a STL, which I imported into WanhaoMaker.
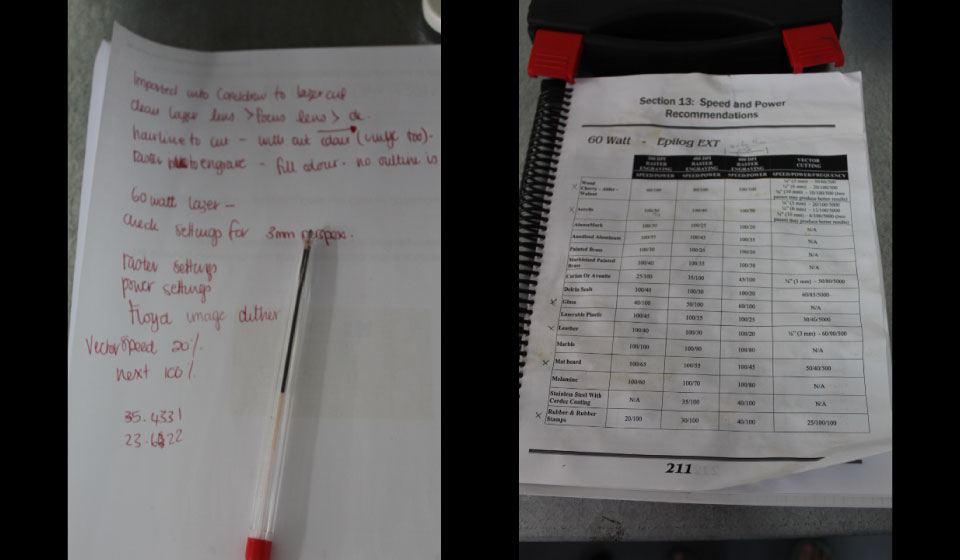
Then I set it up for print > Print > StartSlice > High Quality Duplicator 5.
I set the settings to
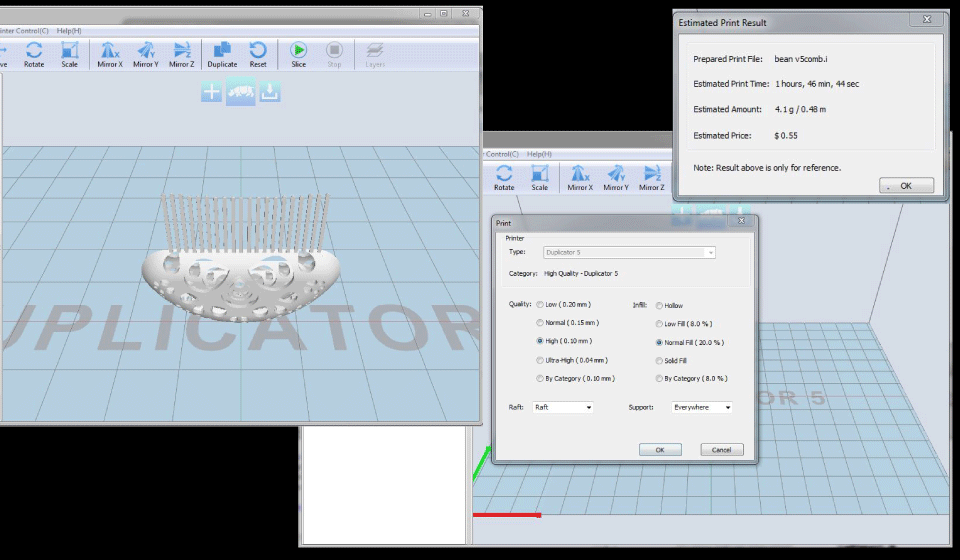
The raft is important to build the base of the printed object and the support keeps the structure of the internal objects steady. This was then saved onto an SD card and put into the printer.
I taped the heated plate with masking tape, to make it easier to remove and to protect the plate. The bed heat was set to 70 degree celsius and the clear PLA fillament to 190 degree celsius.
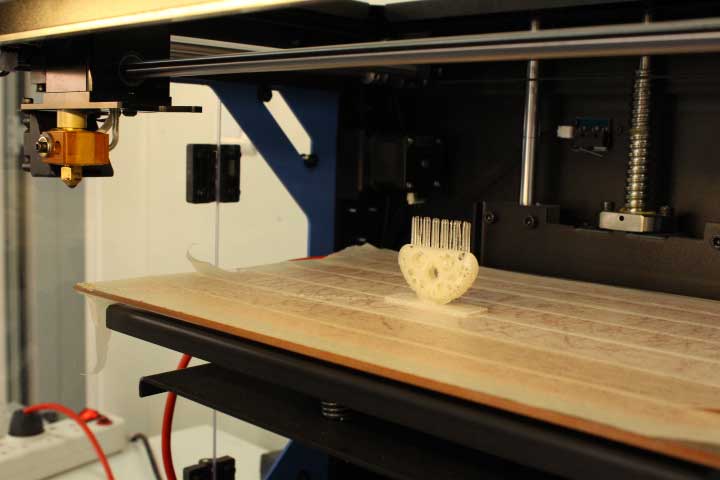
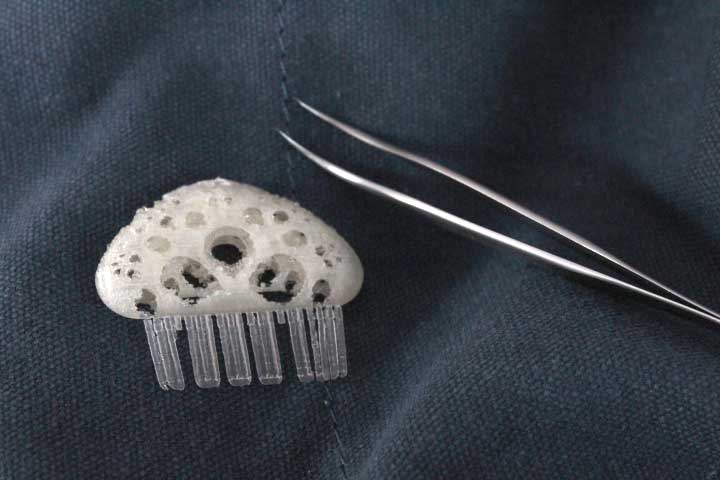
It didn't take too long, but the quality was not great i would have to set the artwork thickness to at least 2mm thickness and the teeth would have to be thickened a lot more.
3D SCANNING {UPDATE}
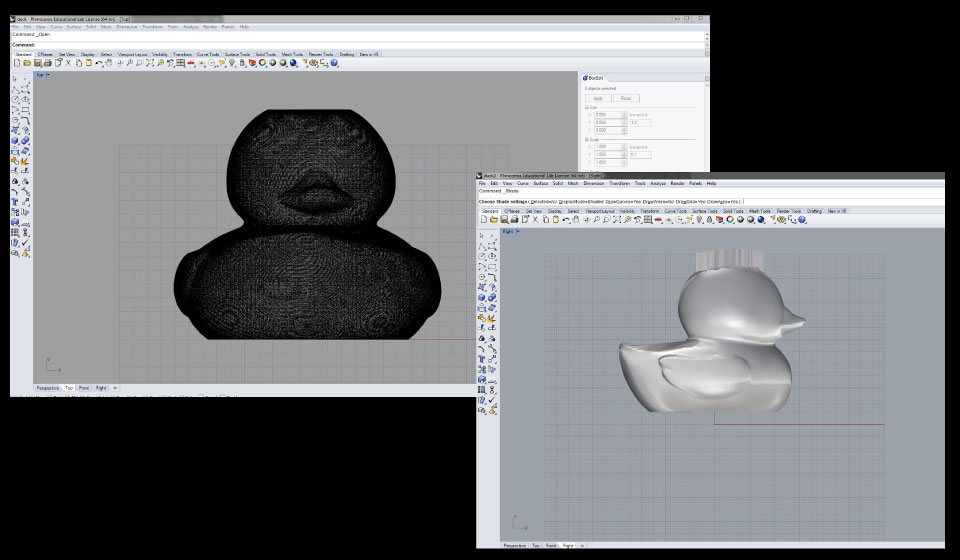
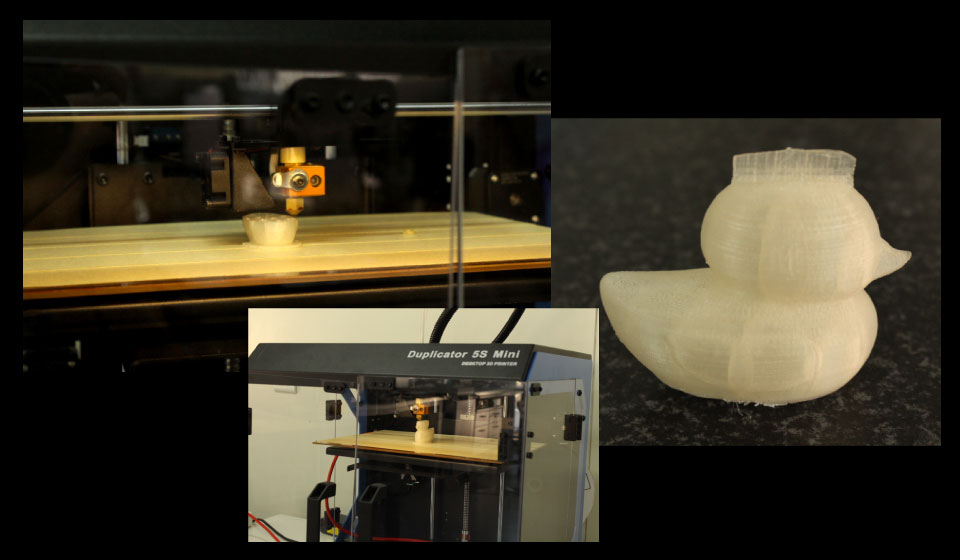
I rescanned, this time a rubber duck, which I will manipulate to look more like a crested barbet (or other generic bird), seeing as I am planning on making a bird feeder as my final project. I am currently having difficulties working with the mesh in Rhino. I have tried to export as .STP .STEP .STAM .IGS and .IGES files to use in Fusion, but it will not export the mesh. I believe you can reverse engineer the mesh to make it exportable, but you need a different version of Rhino than i have available.
I played around for a bit, but could not get RHINO to convert the scan to something I am familiar with.
I rescaled the duck, to make it thinner and then Bjorn showed me how to maniipulate the scan using control points from the task bar. With these control points I then gave the duck a "mohawk" to simulate a look alike to one of the common woodpeckers in Southern Africa. The Crested Barbet.
It really looks nothing like it though, maybe I will paint it.

I exported from RHINO as STL for WANHAO and set up my file for print.
It was a little too big so scaled it down in wanhao, for the task bar, which was pretty easy.
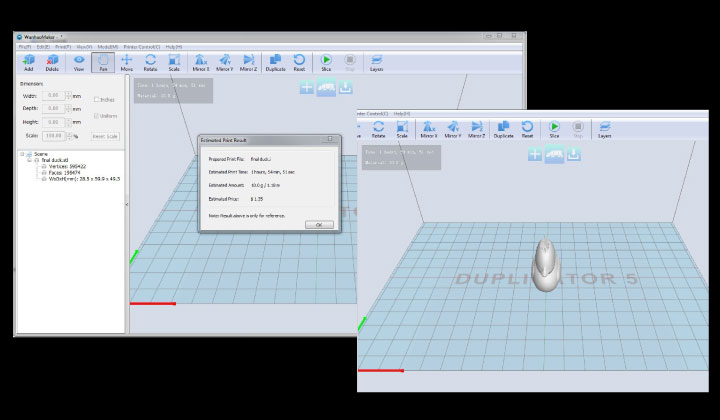
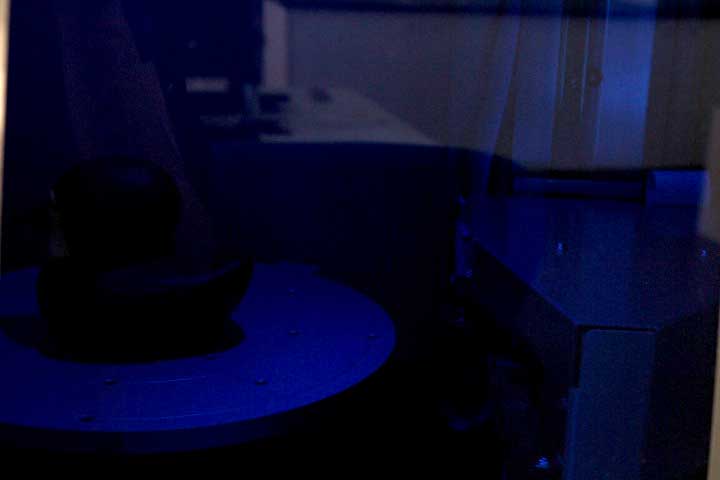
I saved it to the scan disc and set up the 3D printer as before. Here are some photos of the printing and the final punk duck.
Download my working files HERE
3D SCANNING {FUSION 360 UPDATE}
I had sometime and looked into the STL file situation, and found this video
Quick Tip: Working with STLs – Importing and Exporting
So now I can import STL scanned files into fusion 360. But this still does not work. Fusion 360 does not work well with meshes. So I found this tutorial,
working with STL files in fusion 360
I will download and use AUTODESK MEMENTO to convert .STL files to .OBJ (quad) files for future reference so that I may edit any scans in future in a far more professional and acurate manner.
Import the .OBJ (quad) file into Fusion 360. NB TURN ON THE DESIGN HISTORY by clicking on the first tab in the browser and turn on design history.
1. Go into CREATE mode and right click on the mesh in the browser > select convert. It will convert the mesh to a t-spline body with faces and edges.
2. You can now edit the t-spline body and get the file modified to your needs.
3. Once final you can right click on the body again and convert it to a solid body for printing.
4. If you need to go back and edit you can do that in the design history.